A Nail Art/Nail polish blog by a really nerdy software Engineer

Tuesday, 25 May 2021

SWATCHES: Nails Inc // Don't Stop Be-leafing Duo

Nails Inc Don't Stop Be-leafing Duo Swatches Palms In the Air Grow Your Eco

Nails Inc Don't Stop Be-leafing Duo Swatches Palms In the Air Grow Your Eco

I found these beautiful jungle shades in TK Maxx this weekend for £6.99....Well I actually found them last week and convinced myself that I didn't need anymore nail polish. Well, we know that's a lie so I bought them this weekend. At £3.50 a shade; it's a bargain.

Conjuring up images of water droplets dripping off monstera leaves and the squawk of an exotic bird somewhere in the background; this duo also manages to remind me of Christmas with the deep rich shades.

Palms In The Air // hunter green creme
Collection: Don't Stop Be-Leafing
Release: Summer 2020
Coats: 1
1 Nails Inc Don't Stop Be-leafing Duo Swatches Palms In the Air Grow Your Eco

This wonderful self-levelling creme is ready in just one coat and is an absolute dream to apply. I think this was one of the fastest applications I've ever done. It has a shiny finish but definitely needs a top coat. My favourite thing about this shade is that it's a dark green but you can still tell it's green; most of them just look black when applied. Make sure you put on your best stain-resistant base coat though because rich green shades like this will cause some pretty hefty yellow stains.

It also doubles as a pretty good stamping polish due to how opaque it is. 

Grow Your Eco // bronze shimmer
Collection: Don't Stop Be-Leafing
Release: Summer 2020
Coats: 2
1 Nails Inc Don't Stop Be-leafing Duo Swatches Palms In the Air Grow Your Eco

I'm not usually one for bronze shades but this one gets a pass. I think it matches the green extremely well and together they make either the perfect elf christmas look or summer jungle look. For a shimmer is surprisingly opaque as well with little bits of red and green pieces thrown in with the bronze mix. Under direct lighting it has a completely different look.

// Verdict

A solid duo from Nails Inc. I'm in LOVE with the wooden caps, I wish more polishes had them. There's also a set of four called "Nude in the Tropics" which features the same box print but has some nice beige/pink shades...I may have to buy them now because I love the box print. I wish they would make the polishes easier to get out though as I ripped the box :( 

1 Nails Inc Don't Stop Be-leafing Duo Swatches Palms In the Air Grow Your Eco

1 Nails Inc Don't Stop Be-leafing Duo Swatches Palms In the Air Grow Your Eco

Also, this is my first post in like 6 months....I took a break from doing anything really but that doesn't mean I stopped buying nail polish; that could never happen.
SHARE:

Monday, 16 November 2020

SWATCHES: Maybelline Color Show // Canal Street Coral, Black Edge & Bronze Babe

SWATCHES: Maybelline // Canal Street Coral,  Black Edge & Bronze Babe

Canal Street Coral // Light Coral Creme
Collection: Color Show 60 Seconds
Release: ??
Coats: 3

Maybelline Color Show Canal Street Coral Swatch

If you search "peach nail polish" on eBay, you will see this polish pop up and it's always out of stock; boo hoo. However, I found it in-stock at my local TK Maxx (where else?) and I immediately bought it because this year is the year of peach/coral/pink shades for me. This one is slightly darker on the nails and has streaks but overall I'm happy with the application.

Black Edge // Black Creme
Collection: Color Show Precise Skinny
Release: ??
Coats: n/a

Maybelline Color Show Black Edge Swatch

Maybelline Color Show Black Edge Swatch

I was interested in this when I saw it because I thought it would be an excellent black stamping polish as it seems to be specifically for details. For that you will need quite a thick, pigmented polish; alas, this is neither thick nor pigmented. I will admit, it does kinda do well at drawing straight black lines which I guess is the point but I wanted a stamping polish.

Also, this polish will dry up very quickly as you leave the lid off whilst trying to perfect those straight black lines. This is why I prefer using acrylic as I don't have to worry about wasting an entire tube of product in the pursuit of detail.

Bronze babe // Gold Flakie
Collection: Color Show The 24 Carat Nudes
Release: ??
Coats: 3

Maybelline Color Show Bronze Babe Swatch

I actually bought this a while back, a good 4 years I think. I'm currently making my way through my entire collection so I have swatch photos for my app so I thought I'd add this to the post as well. I actually really like this shade; it's one of my favourite gold flaky top coats as you actually get flakes and other shimmery bits. In the swatch I'm wearing 3 coats sponged on my index and middle finger and then 3 normal coats on the others.

SHARE:

Saturday, 14 November 2020

Snowflake Queen // Blue Jelly Winter Look with Glitter

Snowflake Queen Blue Snowflake Jelly Winter Look with Glitter

Ah the jelly sandwich. This was actually my first go and it took so long but it looks great...I probably should've done this with actual gel thanks to all the layers that needed time to dry but fortunately I did this look on false nails and could come back every 30 mins or so to apply another layer.

Snowflake Queen Blue Snowflake Jelly Winter Look with Glitter

I love them though; they're just so sparkly and shiny. They're also very different to what I would normally do; no peach or monstera leaves in sight!

Snowflake Queen Blue Snowflake Jelly Winter Look with Glitter

Layers (Snowflake nails):
1 - Catwalk Queen
2 - Snowflakes
3 - ooh la lolly
4 - Catwalk Queen
5 - Snowflakes
6 - ooh la lolly
7 - Snowflakes
8 - ooh la lolly
9 - Snowflakes
10 - ooh la lolly
11 - Snowflakes
12 - 3D pop tint top coat

Layers (Glitter nails):
1 - ooh la lolly
2 - London Lane (sponged on til most of the nail was covered. This glitter shade did not like being sponged on. Took about 4/5 layers)
3 - ooh la lolly twice
4 - 3D pop tint top coat x2
5 - broken holo nail stickers

Woooo that's a lot of layers. I actually left them overnight and then applied some more top coat the next morning. I'm so glad these are false nails!

Snowflake Queen Blue Snowflake Jelly Winter Look with Glitter

I was going to put some christmas text on one of the nails but I like how these could just be generic winter nails so I left it and just added some more snowflakes for the very top layer. I'll be doing a post on the Essie 3D pop tint soon as well because I love it; I wish I'd bought the others in TK Maxx now.

Snowflake Queen Blue Snowflake Jelly Winter Look with Glitter

Snowflake Queen Blue Snowflake Jelly Winter Look with Glitter

I also felt like the glitter nails were missing something so I added the little holo stickers. I did want to add  more 3D arrow like shape but I only have them in gold. Guess I need to go buy some more nail art wheels in silver!

Snowflake Queen Blue Snowflake Jelly Winter Look with Glitter

Polishes/Tools used:
- Barry M // Catwalk Queen (blue glitter)
- Essie // ooh la lolly (blue jelly), Gel Setter 3D Pop Tints Top Coat (blue)
- Twinkled T // Glow Up (white)
- Nails Inc Winter Lights // London Lane (chunky blue glitter)
- Harunouta Stamping Plate // L056
- Essence // Broken Holo Nail Stickers
SHARE:

Thursday, 27 August 2020

Over The Top-ical // Tropical Leaves, Line Art & Glitter Nail Design

Tropical Leaves Nail Art Design Green Glitter Geometric

Wow I used so many polishes in this one. It's definitely over-the-top...hence the name. I've also developed a love for matte green glitters; they're just perfect. I need Zoya to do more. Speaking of Zoya, have you seen the new autumn collection. It was love at first sight for me; I'm actually thinking of spending over £100 to get the full set. It's available for pre-order on NailPolishDirect but £110 is a lot of money for just 12 shades.

Anyway, I'm trying my best to cling onto summer nails with this look inspired by Lieve91's black & white geometric design that she did last year which you can now recreate thanks to her collab with MoYou London.

Tropical Leaves Nail Art Design Green Glitter Geometric

I'm not sure what would be easier; practice stamping to get straight black lines or practice painting. This doesn't look completely awful though so I'm happy.

Tropical Leaves Nail Art Design Green Glitter Geometric

The glitter nails are a green shimmer with two layers of the Zoya matte glitter on top and then some holo glitter because I couldn't resist. I had to take them off almost immediately though because these shades stain within about an hour. I'll have to paint some falsies with this combo so I can wear it for longer. 

Here's my prototypes for this look:

Over The Top-ical // Tropical Leaves, Line Art & Glitter Nail Design

The entire look came together over a few days as I kept practicing designs. The one on the right is completely hand=painted with acrylic paint. I bought some flow-improver and it's radically changed how my acrylics behave and they apply a lot smoother now than the photo above.

Over The Top-ical // Tropical Leaves, Line Art & Glitter Nail Design

Polishes/Tools Used:-
- Ciaté // White Heat (white)
- Nails Inc // Girls Got Coals (dark green)
- Sinful Colours // Amazonian (dark green shimmer)
- Zoya // Shawn (dark green), Ness (pale green), Cece (matte green glitter)
- Daisy DND // 469 Vast Galaxy (holo glitter topper)
- MoYou London // Bora Bora (light teal), Mint Condition (light mint), Olive Tree (pale olive)
- Born Pretty // 12 (primary green)
- Twinkled T // Tickled (pink), Glow Up (white), Vibin' (black)
- MoYou London Stamping Plates // Collab 03, Paradise 05, Tropical 36
SHARE:

Wednesday, 4 March 2020

Candy Leaves // Pink, Rose Gold & Green Leaf Nail Art Design

Candy Leaves // Pink, Rose Gold & Green Leaf Nail Art Design

Well this came out of nowhere. I really wanted to do some free hand painting but I also really wanted to use the leaf designs on the Love Is...04 plate by MoYou and so this look was born. It's definitely inspired by the ever-amazing @lieve91 (I don't think I'll ever get her hand pose right) and I need the days to start warming up so I can transition to just palm leaf mani's all the time.

Candy Leaves // Pink, Rose Gold & Green Leaf Nail Art Design

Candy Leaves // Pink, Rose Gold & Green Leaf Nail Art Design

I invested in some higher quality acrylic gouache paints a few months ago after asking Lieve91 what kind of Liquitex paint she used. Unfortunately I can't afford Liquitex just yet, but I did see a set of acrylic gouache in TK Maxx for £20 and it seemed higher quality than what I usually buy. This was my first time using the different type of paint and I have to say I'm impressed. It is so much more pigmented than normal acrylic but it mixes with water like watercolour paints to give that beautiful ink-washed look. I have a feeling marble nails will be really easy with these paints.

Candy Leaves // Pink, Rose Gold & Green Leaf Nail Art Design

Candy Leaves // Pink, Rose Gold & Green Leaf Nail Art Design

The leaf designs though are just everything to me. I had a dream about wanting monstera leaves in this exact wire frame type design and then MoYou brought this plate out; it's like they read my mind.

Candy Leaves // Pink, Rose Gold & Green Leaf Nail Art Design

Polishes/Tools used:-
- Barry M Gelly Hi Shine // Candy Floss (pink)
- H&M // Dawn Song (gold/pink glitter), Bijoux (Rose Gold Glitter)
- Pebeo Studio Gouache // 11 (Blanc), 42 (Emerald Green)
- Twinkled T // Glow Up (white)
- Barry M // Matte Top Coat
- MoYou London Stamping Plates // Love Is...04
SHARE:

Thursday, 20 February 2020

Heart Strings // Pink & Rose Gold Glitter Nail Art

Heart Strings // Pink & Rose Gold Glitter Nail Art

Ok, now that valentines is over I suppose I can do some real valentines nail art. I've been wanting to do something with this beautiful OPI shade since I bought it in TK Maxx a while ago. It's from their 2019 Nutcracker collection and one of the 3 glitter shades I don't own from that set. I absolutely love it; it's a stunning mix of red and gold glitter.

Heart Strings // Pink & Rose Gold Glitter Nail Art

This one was super easy and quick as well. Just 2 layers of pink and then lightly dabbing the glitter on using the brush. I contemplated using the sponging method but I didn't see the point for this.

Heart Strings // Pink & Rose Gold Glitter Nail Art

Heart Strings // Pink & Rose Gold Glitter Nail Art

Polishes/Tools used:-
- Cuccio // I Left My Heart In San Francisco (sheer pink)
- OPI // I Pull The Strings (rose gold glitter)
- Revlon Colorstay Gel Envy // Diamond Top Coat
SHARE:

Monday, 6 January 2020

Ciaté Mini Mani Month 2019 // Days 22 - 24

Ciaté Mini Mani Month 2019 // Days 22 - 24

Day 22
Starcrossed // Gold & Peach Glitter

Ciaté Starcrossed Swatch - Mini Mani Month 2019

Ciaté Starcrossed Swatch - Mini Mani Month 2019

I like the shade of the glitter, peach is always a great shade that will suit anyone but I'm wondering how I would use this shade. It would build up easily by sponging it on for a full glitter mani but make sure you're wearing a peel off basecoat otherwise you'll be soaking your nails in acetone for a few minutes.

Day 23
Snatch // Bright Red Jelly

Ciaté Snatch Swatch - Mini Mani Month 2019

It's a shame I hate red shades because the formula on this is amazing. It applies beautifully with a high shine finish and only one coat is needed. You can slightly see your tips peeking through however because it's a jelly, there's no streaks so it's perfectly acceptable.

Day 24
Party Popper // Rose Gold Holo Shards in Clear Base

Ciaté Party Popper Swatch - Mini Mani Month 2019

Ciaté Party Popper Swatch - Mini Mani Month 2019

Like last year, we end with a full size glitter polish. I'm much happier with this years offering though as the stars from the last one were a nightmare to get out. This one is abundant with shards and I love the holo. I'm wearing a couple of coats on top of 'I Left my Heart in San Francisco' by Cuccio. This shade is a lot easier to manipulate when sponged on though.

// Verdict

And that's it for this years Mini Mani Month! I ended up with 9 repeats which isn't too bad but if you have a lot of polish (like I do), I won't be using them as much as others would. I hope that 2020's calendar features less repeats but seeing as how the calendar was reduced to £20 before christmas, I don't think they sold as many as they were hoping for (it still selling for £20 now on their website).

Days 1 - 7
Days 8 - 14
Days 15 - 21
SHARE:

Tuesday, 10 December 2019

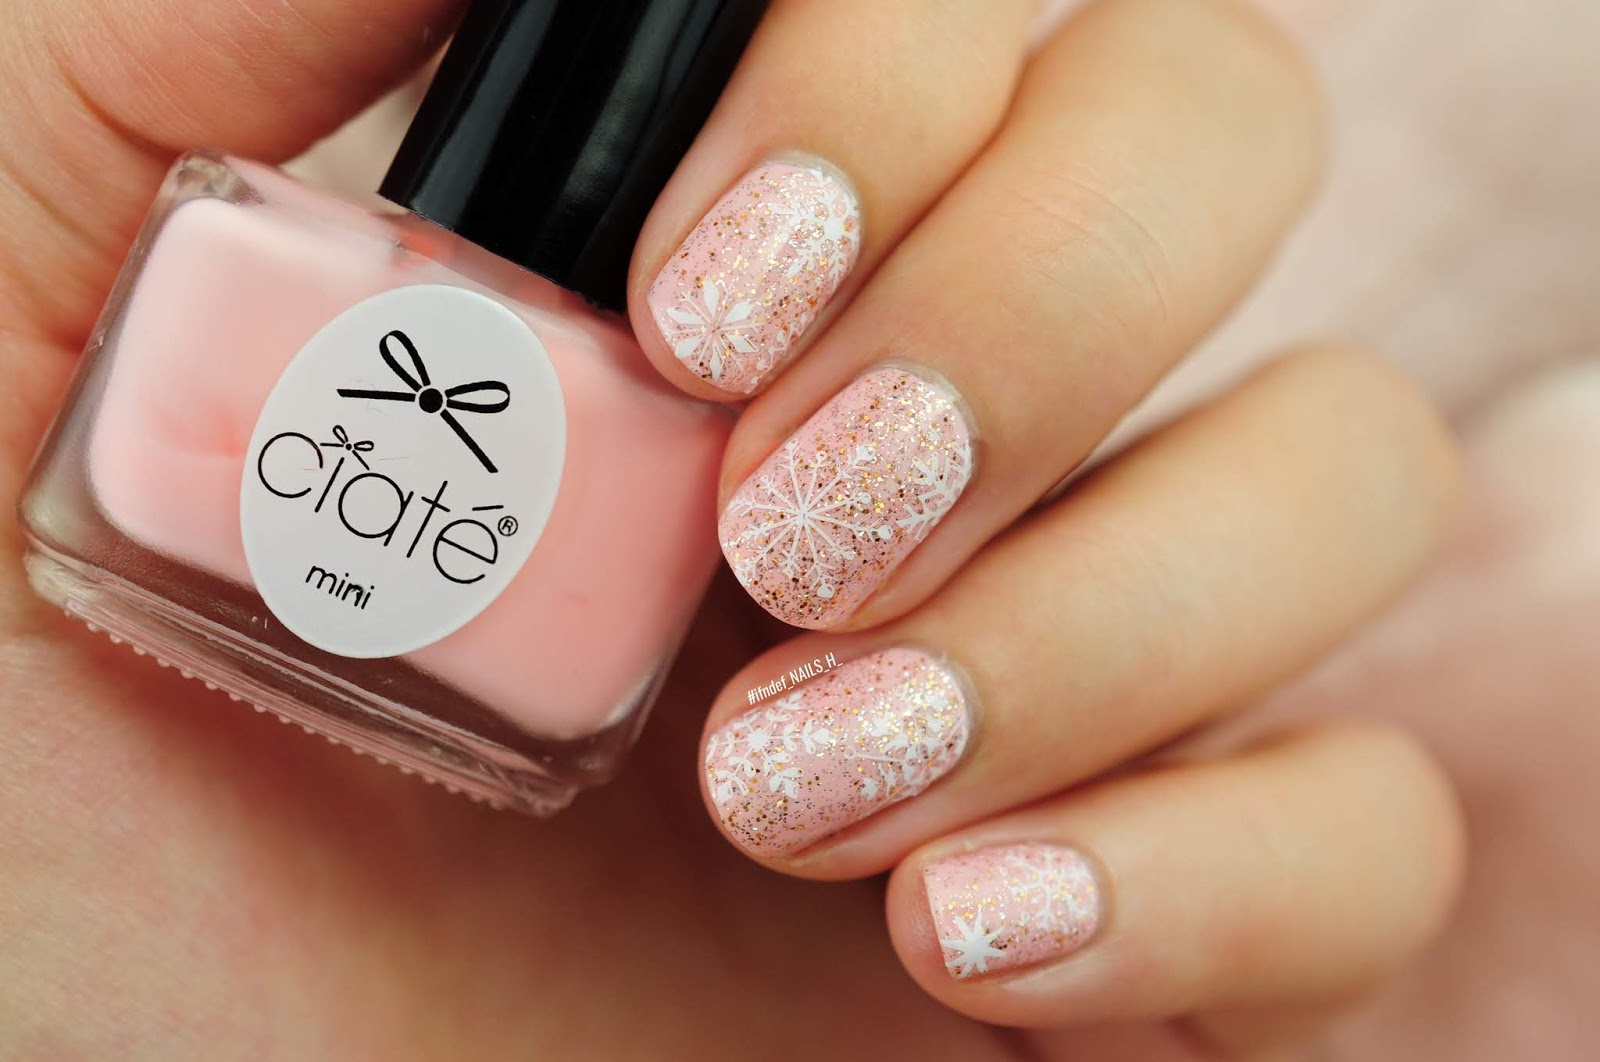
Tutu Bijoux // Pink & Rose Gold Snowflake Nail Design

Tutu Bijoux // Pink & Rose Gold Snowflake Nail Design

I keep saying "tutu bijoux" like "boop boop be-doo" and it's starting to annoy me. What a shocker, I'm annoying myself. November was a very annoying month though because Black Friday happened right at the end of my self imposed "No Nail Polish November" and I bought all the fucking nail polish. No joke, I literally bought 25 polishes from H&M. 


And so now I have all this polish I just bought and an advent calendar to swatch. So I did a nail look instead because I can't stop.

Tutu Bijoux // Pink & Rose Gold Snowflake Nail Design

Tutu Bijoux // Pink & Rose Gold Snowflake Nail Design

I just bought the glitter topper from H&M in their sale for £1 and it's just stunning. I wore 3 coats of it alone for the work Christmas party. It does distract from the snowflakes a little too much though. @paulinaspassions also posted a similar look to this a few days ago using some iridescent hexagonal glitter which suits it more. I wish I'd seen the post before I did this!

Tutu Bijoux // Pink & Rose Gold Snowflake Nail Design

Polishes/Tools Used:
- Ciaté // Tutu (pastel pink)
- H&M // Bijoux (Rose Gold & Silver glitter)
- Born Pretty // #4 (white)
- Revlon Colorstay Gel Envy // Diamond Top Coat
- Harunouta // L056 Stamping Plate
SHARE:

Wednesday, 13 March 2019

Makin' Waves // Glitter Mermaid Nail Art

Makin' Waves // Glitter Mermaid Nail Art

What's this? Some nail art? I know it's been a while. I had a quite a big deadline for my dissertation the other day and I've been working on it non-stop. It's not the final hand in, but there's only two months left and I can't afford to fall behind. I've worked so hard these past three years, I can't fail now. However, since I've caught up on my work, I've scheduled in some 'me' time as I've not had much fun. Doing my nails last night for the first time weeks was so nice!

Clairestelle8 over on Instagram has a March challenge and whereas I won't be actively trying to complete it this month (I have to much work to do), I'll be dipping in and out fo the challenges. The prompt for the 9th was 'Mermaid'. I wanted more than anything to just to mermaid scales but I forced myself to something a little different. Plus I've been wanting to use this glitter since I bought it in January.

Look at it! It's so beautiful. Money well spent.

Makin' Waves // Glitter Mermaid Nail Art

Makin' Waves // Glitter Mermaid Nail Art

How I did it:-
I started off with 1 layer of Mint Chocolate Chip. The middle finger uses a design on Sailor 06 and a mixture of Dream Holiday and #284 ( I know it doesn't look like it, but there is a gradient there). The index finger uses Sailor 18 which has 3 different waves patterns on it. I used these with Deep Ocean, Surf's Up and #17 to create the waves. I did the top colour first, then the black tail fin, then the next two colours. To top it off I used some of the stars at the top of Sailor 18 with Stop, Shop & Roll. The glitter is then two sponged layers with two layers of top coat to get a nice smooth look.

Makin' Waves // Glitter Mermaid Nail Art

Makin' Waves // Glitter Mermaid Nail Art

Polishes/Tools Used:-
Morgan Taylor // Wrapped In Riches (teal glitter)
Morgan Taylor // Mint Chocolate Chip (pastel mint)
Morgan Taylor // Stop, Shop & Roll (metallic teal)
MoYou London Stamping Polish // Dream Holiday (sky blue)
MoYou London Stamping Polish // Surf's Up (cerulean)
MoYou London Stamping Polish // Deep Ocean (ocean blue)
Born Pretty Stamping Polish // #17 (blue)
Born Pretty Stamping Polish // #284 (pastel blue)
Born Pretty Stamping Polish // #3 (black)
- Avon Mark Gel Shine // Top Coat
MoYou London Stamping Plate // Sailor 06 & Sailor 18
SHARE:

Tuesday, 26 February 2019

Roses // #Clairestelle8 Valentines Challenge

Roses // #Clairestelle8 Valentines Challenge

This is so late! I feel like that has just been my motto throughout all of February. I've got a full formative deadline for my dissertation due in 10 days and I'm completely freaking out. But anyway, here is my attempt for the 'Roses' prompt of the Clairestelle8 challenge on the 19th. 

This is actually my fourth attempt at this prompt as the other three were just awful. I tried doing a stained glass window look which I hated and painted over it with this blue smoosh which turned out atrocious. I then did some lime green and coral nails....yeah. I have so many looks to put in this months FAIL post.

I'm not super happy with how these turned out either but you can't really mess up when using this glitter because when the sun hits it, magic happens;

Roses // #Clairestelle8 Valentines Challenge

This glitter is my favourite and the holo sparkle from it is the best you'll find. I wanted to do something a bit more spectacular but with limited rose stamping designs (and not much time) I was stumped.

How I did it:-
I started out with a layer of top coat and when it was just about dry I used an eyeshadow applicator to apply the glitter. I believe this is called 'burnishing'; it creates a nice smooth effect and really helps with holo glitter. I then applied another layer or top coat and did the same; ending with two layers of top coat. Using a white stamping polish I used the design from the Princess plate on top. Also, I won't be using the China Glaze top coat with stamping polish again as it just smeared it really bad.

Roses // #Clairestelle8 Valentines Challenge

Polishes/Tools used:
- Elite Glitter Manchester // Sweet Pink 004 Glitter
- Born Pretty Stamping Polish // #4 (white)
- MoYou London Stamping Plate // Princess 12
- China Glaze // No Chip Top Coat
SHARE:
Blog Design Created by pipdig