A Nail Art/Nail polish blog by a really nerdy software Engineer

Sunday, 26 April 2020

I Pink I Must Leaf Now // Banana Leaf & Pink Nail Art Design

I Pink I Must Leaf Now // Banana Leaf & Pink Nail Art Design

The weather has been amazing this month and so it's time for non-stop pink leaf mani's. It's been a while since I've used this pink shade as well; it's one of my favourites and Avon have released in a new formula that I'm tempted to buy as you can never have too much nail polish.

I Pink I Must Leaf Now // Banana Leaf & Pink Nail Art Design

I Pink I Must Leaf Now // Banana Leaf & Pink Nail Art Design

I'm currently waiting on some new stamping plates to arrive as well that have some fantastic leaf, feather and mandala prints on them for some proper summer designs. I've been after these plates for a while but they were a bit expensive for a random eBay brand and but I finally managed to get hold of them for £1.50 each with free postage and packaging. So I'm having to make do with the limited number of plates I brought with me for quarantine.

I Pink I Must Leaf Now // Banana Leaf & Pink Nail Art Design

I Pink I Must Leaf Now // Banana Leaf & Pink Nail Art Design

I think I did pretty well though. I wanted to keep this look simple so just did a basic double stamp with a pink and green polish. I wish there was more distinction between the white and pink polishes; they ended up looking a bit too similar.

I Pink I Must Leaf Now // Banana Leaf & Pink Nail Art Design

Polishes/Tools Used:
- Avon Mark. Gel Shine // I Pink I Can (pale pink)
- H&M // Ice Cold Milk (sheer  off white)
- MoYou London // Candy Floss (pink), Turquoise Mint (green)
- Twinkled T // Liquid Gold (gold)
- MoYou London Stamping Plates // Tropical 28 (leaves), #SummerVibes (triangles)
- Revlon Colorstay Gel Envy // Diamond Top Coat
SHARE:

Saturday, 22 February 2020

Match That Mani // Sainsbury's Blue & Yellow Oriental Teacup

Match That Mani // Sainsbury's Blue & Yellow Oriental Teacup

This didn't turn out exactly how I envisioned it in my head but it will do cause it's hella cute. I saw these cups in Sainsbury's the other weekend and they were on offer for £1.50 each. How could I resist? They're supposed to be used a teacups for fancy oriental tea but I don't really drink tea so I use them for my orange juice in the morning and I just can't; they're freaking adorable.

Match That Mani // Sainsbury's Blue & Yellow Oriental Teacup

I won't lie; the sole reason I bought them was because I wanted to put the design on my nails 🙈 I don't have the exact wave design on a stamping plate and this was the closest I could get. Unfortunately the polish I used did not want to pick up properly and it's a little patchy in places. MoYou polishes are so hit and miss; I really need to stop buying them and buy more Twinkled T instead.

Match That Mani // Sainsbury's Blue & Yellow Oriental Teacup

This was 2 layers of Blanc followed by the blue waves which I placed about a cm away from the tip. I then painted the tips in Lemon Sugar; my favourite yellow shade. This is the only polish I've ever used fully.

Match That Mani // Sainsbury's Blue & Yellow Oriental Teacup

Polishes/Tools used:-
- Essie// Blanc (white)
- MoYou London // Dusty Blue (pale blue)
- Avon True Colour // Lemon Sugar (pastel yellow)
- Revlon Colorstay Gel Envy // Diamond Top Coat
- MoYou London Stamping Plates // Sailor 07
SHARE:

Monday, 16 September 2019

Camo Clouds // Clairestelle8 Challenge September 2019

Pink and Blue Camo Nails Clairestelle8 September challenge

Pink and Blue Camo Nails Clairestelle8 September challenge

My first camo look! And I did it without the use of stamping; it's pure hand drawn baby. I'm actually quite proud because it looks, well, good. I'm not the biggest camo fan so I decided to make it something I would like to wear by using basic colours. 

I started off with a white base and created gradients using the main three colours and then used the larger end of the dotting tool to make the camo design. It took me around 10 minutes to do the entire look. I was originally going to just do 1 nail with the camo on it and leave the ombres however, I keep forgetting that the french tip polish from Avon is trash and the look was patchy.

Pink and Blue Camo Nails Clairestelle8 September challenge

Pink and Blue Camo Nails Clairestelle8 September challenge

The colours make this for me though. Who needs actual camo when you can have basic camo?

Pink and Blue Camo Nails Clairestelle8 September challenge

Polishes/Tools Used:-
Avon True Colour // French Tip White
Essence The Gel // Perfect Match (dusty pink)
H&M // Wild Lilac (lilac), Huldra (blue)
Barry M // Matte Top Coat
Essence // Dotting Tool
SHARE:

Saturday, 13 April 2019

Raw Beauty // Look Fantastic April 2019

Raw Beauty // Look Fantastic April 2019

Raw Beauty // Look Fantastic April 2019

Raw Beauty // Look Fantastic April 2019

What's this? The Look Fantastic box up early??? Well I've got a lot of stuff on later this month so I thought I'd take a day out to get some posts scheduled. I was a bit unsure of what to do with the box initially (although it's one of my favourite designs to date; every box should be like this). Then I saw the magazine and knew I had to do a cute leaf print on paper look.

The box itself was a little lacklustre. I would've preferred a conditioner over shampoo but the lipstick shade is quite nice for once. I thought it was a bright red but it's this nice rusty/copper/rose shade. The serum, mask and moisturiser will get used straight away but the bath salts will go into my storage box for the special day that I finally can afford a place with a bathroom big enough for a bath lol.

Raw Beauty // Look Fantastic April 2019

Raw Beauty // Look Fantastic April 2019

Surprisingly I couldn't match the shade of the box as I only have 3 brown shades...for shame. Guess I need to buy more. I stuck a matte top coat on as well but I'm glad I took photos before that as it really ruined it.

How I did it:-
I started off with 2 layers of Loom Mates then stamped on the white squares. Well, they're actually rectangles that I painted over to make them blindingly white. I can't freehand for shit. I then used the silver and a line from Holy Shapes to outline the 'paper'. Then using a multi-tude of greens (and a purple) I stamped on the leaves using the Overprint and Tropical plates.

Raw Beauty // Look Fantastic April 2019

Polishes/Tools Used:-
Cuccio Colour // Loom Mates (light brown)
Avon Gel Finish// Créme Brulee (light nude)
Born Pretty Polish // #4 (white), #2 (silver), #12 (green), #379 (pastel yellow), #3 (black)
MoYou London Polish // Olive Tree (pastel olive), Orchid Chic (purple)
Born Pretty Warm Tea Series // WT01 Melody of Music Box (mustard green)
Revlon // Quick Dry Top Coat
Born Pretty Plate // Overprint L002
Nicole Diary Plate // ND-038
MoYou London Plate // Tropical 35
SHARE:

Friday, 15 March 2019

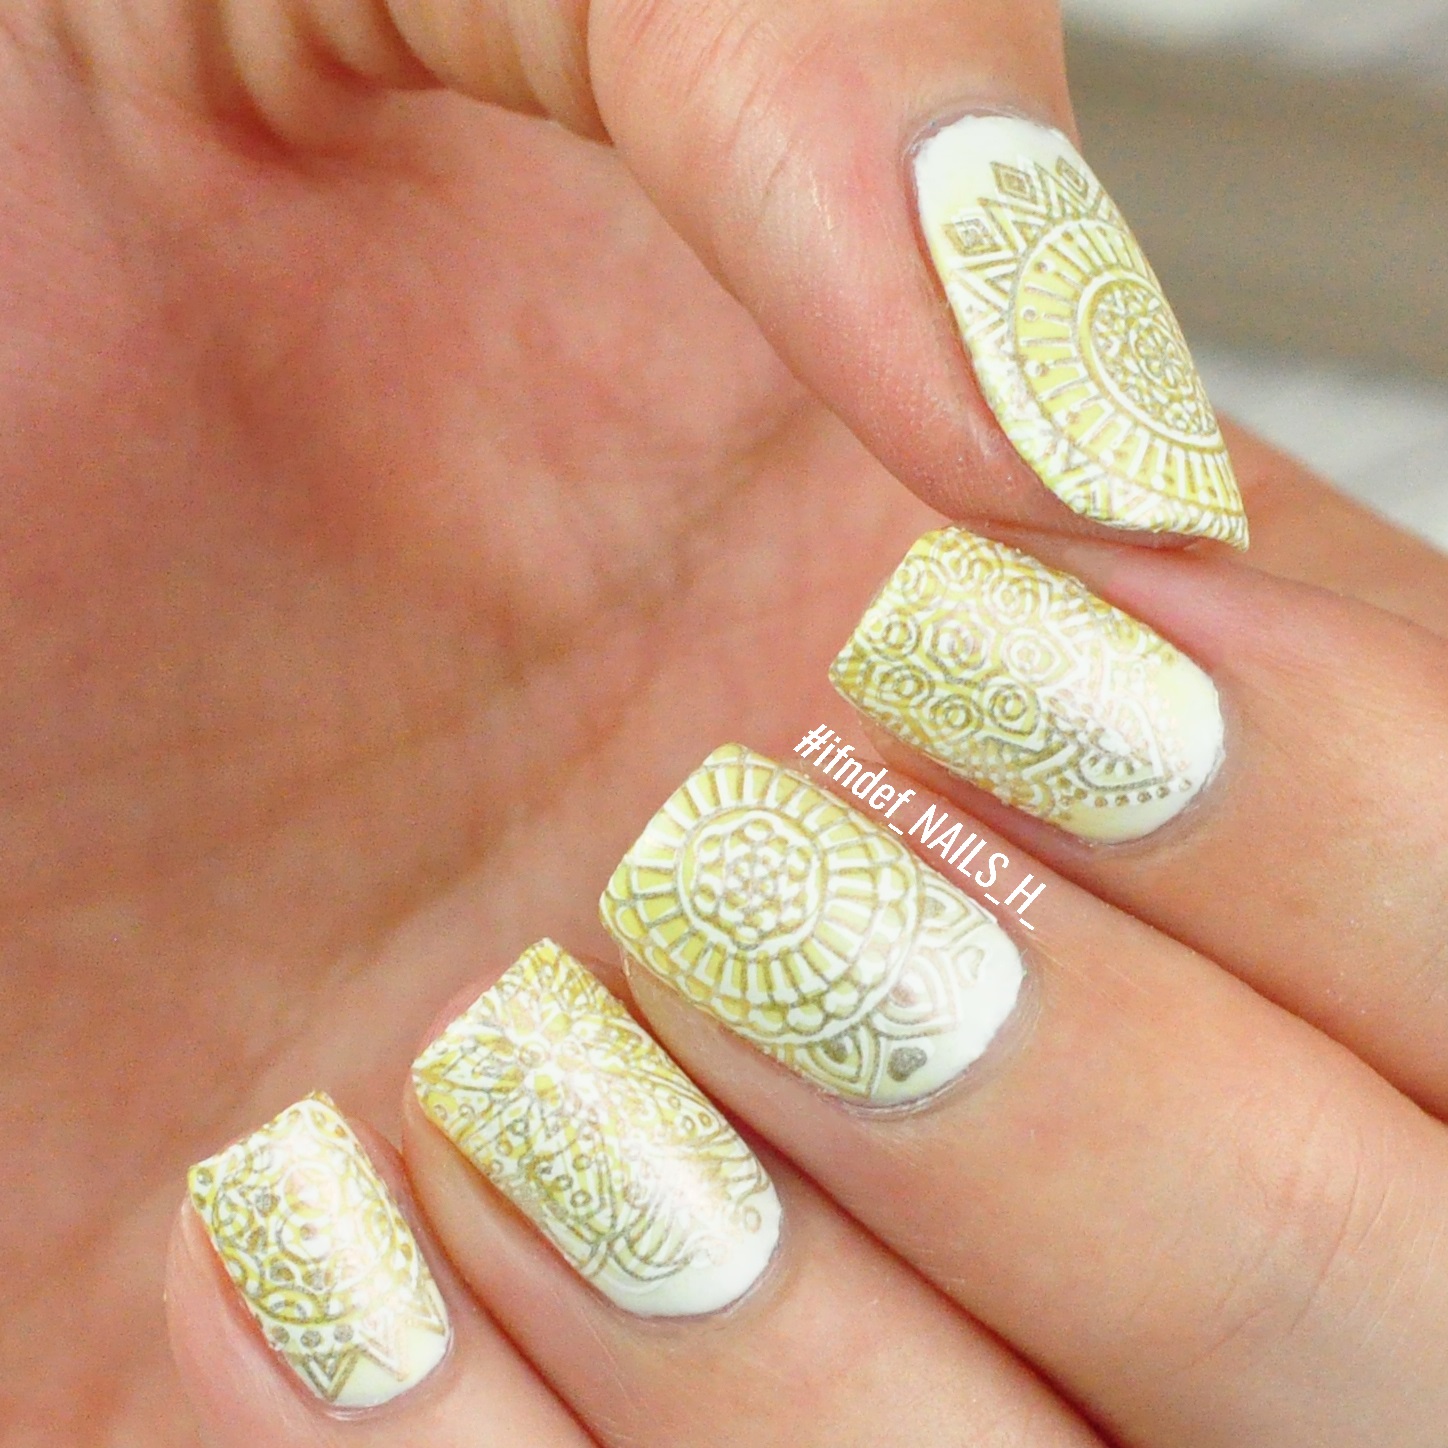
Lemon Mandalas // Spring Yellow Mandala Nail Art

Lemon Mandalas // Spring Yellow Mandala Nail Art

Yes, those are my nails. They were getting a bit to long again and instead of lopping them off I decided to try the square style that appears to be all the rage with nail artists....these nails are not for me. Not only do they look very strange without polish but there's just something about them that makes me go "eurgh". On me anyway. I love how they look on others but this isn't my style. I filed them back into some sort of curved oval shape but now my nails are little too short because of it.

Anywho, the prompt for Clairestelle8's March challenge on the 12th was Mandalas and I love doing mandala nails. In fact, this nail plate was part of my first nail plate order. I was also thinking about this shade as well and how I hadn't used it in a while. It's called Lemon Sugar by Avon and it's my absolute favourite nail polish shade; I just think it's perfect and I always get asked about it when I'm wearing it.

Lemon Mandalas // Spring Yellow Mandala Nail Art

Lemon Mandalas // Spring Yellow Mandala Nail Art

How I did it:-
I started off with 1 layer off Blanc then sponged on four layers of Blanc and Lemon Sugar. After a layer of top coat and I then stamped on some mandala designs in #4 and followed it up with Pink Planet on top.  An easy peasy one today!

Lemon Mandalas // Spring Yellow Mandala Nail Art

Polishes/Tools Used:-
- Essie // Blanc (white)
Avon Nailwear Pro+ // Lemon Sugar (pastel yellow - this is the old formula, the new one is the Avon true colour)
Born Pretty Stamping Polish // #4 (white)
Born Pretty Stamping Polish - The Universe Series // BPU03 Pink Planet (gold to pink duochrome)
Avon Mark Gel Shine // Top Coat
Born Pretty Stamping Plate // BP-L051
SHARE:

Friday, 15 February 2019

Hearts // #Clairestelle8 Valentines Challenge

Hearts Valentines Day Nails // #Clairestelle8 Valentines Challenge - White Marble Rose Gold Nail Designs

So I'm trying my best to catch up thanks to this amazing cold that decided to grace me with it's presence and this is my design for the 12th which was hearts. On the first entry I did the exact same white marble design on one finger (albeit with a hollow heart) and I liked it so much I just really wanted to do it again. I also didn't have any other heart stamps so this had to do. It also doesn't get much more basic than this; white marble and rose gold? Pinterest is gonna be all over this shit.

Hearts Valentines Day Nails // #Clairestelle8 Valentines Challenge - White Marble Rose Gold Nail Designs

Hearts Valentines Day Nails // #Clairestelle8 Valentines Challenge - White Marble Rose Gold Nail Designs

I wanted to do something a little more adventurous but I had time constraints and so I had to do a design that was relatively quick. The next prompt is Anti-Valentines which is way more up my street because eff all the happy people in love....can you tell I'm alone....bloody happy people.

How I did it:-
I started out with two coats of the French Tip polish (which is ridiculous for a French tip polish...annoyed I spent £2.50 on it now) followed by the marble print in I Wonder Where using the Explorer 33 plate. I applied a matte top coat and then used stamps from the Explorer plate and BP L002 in Golden Hour.

Hearts Valentines Day Nails // #Clairestelle8 Valentines Challenge - White Marble Rose Gold Nail Designs

Hearts // #Clairestelle8 Valentines Challenge

Polishes/Tools Used:-
Avon True Colour Nail Experts // French Manicure Tip (....white)
Cuccio Colour // I Wonder Where (light grey)
Ciaté // Golden Hour (rose gold)
Barry M // Matte Top Coat
MoYou London Stamping Plate // Explorer 33
Born Pretty Stamping Plate // Valentines Day BP-L002
SHARE:

Saturday, 2 February 2019

Lace // #Clairestelle8 Valentines Challenge

Lace Nails Valentines Day // #Clairestelle8 Valentines Challenge

Ok, I'm going to dry my best to actually complete this challenge! I'm not really bothered about the prizes; I'm more bothered about getting the nail art done #priorities lol. I decided to go simple for this prompt although now I'm looking at it, I could've used some striping tape at the ends and painted the tips in white to tie it in with the ring finger...where is Captain Hindsight when you need him?


Also, I totally effed up and smudged my middle finger when taking the top photo 😭 I'm so annoyed with myself.

Lace Nails Valentines Day // #Clairestelle8 Valentines Challenge

Lace Nails Valentines Day // #Clairestelle8 Valentines Challenge

How I did it:-
I started off with 1 coat of Halo Rose (I found a use for these polishes after all!) and the stamped on the lace with the white polish and the BP-02 plate. The middle finger has two layers of Cabana Fever followed by a marble print from the Explorer 33 plate in I Wonder Where. I then stamped on the little heart with Golden Hour and the BP-L002 plate. One thing I was worried about was smudging the white polish as that one from Born Pretty smudges so easily. However, my Revlon Diamond top coat came through for me. As long as you have a large amount of top coat on the brush and you don't let the brush touch the nail you should be ok.

The next prompt on the 5th is "Wedding" and well, these definitely look like wedding nails so I'm not sure what I'm going to do for those. Perhaps something soft and pink?

Lace Nails Valentines Day // #Clairestelle8 Valentines Challenge

Lace // #Clairestelle8 Valentines Challenge

Polishes/Tools Used:-
Avon Nail Wear Pro+ // Halo Rose (sheer pearlescent rose)
Born Pretty Stamping Polish // #4 (white)
China Glaze // Cabana Fever (matte white)
Cuccio Colour // I Wonder Where (pale grey)
Ciaté // Golden Hour (metallic rose gold)
Revlon // Colorstay Gel Envy Diamond Top Coat
MoYou London Stamping Plate // Explorer 33
Born Pretty Stamping Plate // BP-02 & BP-L002
SHARE:

Friday, 1 February 2019

SWATCHES: Avon True Colour Pro+ Nail Enamel // Halo Nudes Collection

SWATCHES: Avon True Colour Pro+ Nail Enamel // Halo Nudes Collection


So, a couple posts back I did swatches on Avon's new Cosmic Lights collection and in the same order I also bought the entire Halo series they debuted in that book as well...because nail polish.

Yeesh...a couple of posts back? The Avon Cosmic Lights collection was posted on 17th October 2018...that's how long I've had this post lying in the draft folder. And why? Well here was what I wrote near the end of October:

I'm a sucker for all things pastel and pink and well; this range is just pastel and pink. Also in the brochure they also look like they had a slight pearlescent sheen to them which is something I don't have in any pastels so I thought they'd be a good addition to the collection. Avon brochures are notorious though for swatches but when they finally arrived I was relieved to see that they are brimming with shimmery-ness.

That said, it's taken me a good month to swatch them all (blatant LIES) as these aren't the greatest formula. Due to how sheer they are I thought I could skip a few steps by applying them under a white base coat; don't do this. The white throws off the colour and makes it look dirty and real cheap. Also, they don't look great on top of black. Sure you see the shift easier but it kind of looks like a milky white substance with a colour shift applied on top of black polish; it's not great. You need to spend the time building up 4/5 layers on top of bare nails for the best result. 

Ok, so admittedly I swatched one, got annoyed and couldn't be bothered to do the rest. But now I've done them because they've been sitting in my 'to swatch' pile for months and I just want to get it over and done with. Also, they seem like a good post for February what with them being soft and pink (for the most part.)

Halo White // sheer off-white with pink shift
Avon Halo White Swatch - Avon True Colour Pro+ Nail Enamel // Halo Nudes Collection

Avon Halo White Swatch - Avon True Colour Pro+ Nail Enamel // Halo Nudes Collection

I've swatched this polish so many times it's not even funny anymore. The first time I stupidly did it on top of white base; this does not look good layered on anything, just lumpy. It still looks lumpy and I just can't abide it. It's not that it takes 4 layers just to even get anywhere but it takes so long to dry in between coats and even after a quick dry top coat, you can't do anything with your nails for a couple of hours or it'll smudge. Not a great polish.

Coats: 4

Halo Nude // sheer very pale peach with green shift
Avon Halo Nude Swatch - Avon True Colour Pro+ Nail Enamel // Halo Nudes Collection

Avon Halo Nude Swatch - Avon True Colour Pro+ Nail Enamel // Halo Nudes Collection

This is practically the same as the first shade only it has a green shift to to it. I can't see myself using this for anything because like Halo White, it takes to long to dry and I now have polishes that can achieve this look much faster and with nicer results.

Coats : 3

Halo Pink // sheer pale pink with blue/purple shimmer
Avon Halo Pink Swatch - Avon True Colour Pro+ Nail Enamel // Halo Nudes Collection

Avon Halo Pink Swatch - Avon True Colour Pro+ Nail Enamel // Halo Nudes Collection

This is quite a nice Princess shade...from far away. Up close it's a bit streaky and milky but not completely awful. I don't think it quite matches my skin tone  but I wouldn't rule out using it for a look as I like the shift.

Coats: 3

Halo Rose // sheer pale pink with rose shimmer
Avon Halo Rose Swatch - Avon True Colour Pro+ Nail Enamel // Halo Nudes Collection

Avon Halo Rose Swatch - Avon True Colour Pro+ Nail Enamel // Halo Nudes Collection

Ok, so back in November when I did the Halo Nights design, I was wondering why it took me so many layers to achieve any sort of colour pay off. Now I know why; this shade is practically non-existent. It appears to be a beautiful pastel pink in the bottle with bright rose shift, however on the nail it's almost a clear polish with a rose shimmer shift.

One coat gives the nails a nice shine with a slight shift in the sunlight. Two coats gives your nails a nice sheer pale look with the shimmer. Like the last shade, I think these would be great a Bride nails as they're extremely understated but soft and romantic.

Coats: 3

Halo Lilac // sheer pale lilac with red & blue shimmer
Avon Halo Lilac Swatch - Avon True Colour Pro+ Nail Enamel // Halo Nudes Collection

Avon Halo Lilac Swatch - Avon True Colour Pro+ Nail Enamel // Halo Nudes Collection

And the last shade in the collection is the most opaque. I like this shade, I think it suits my skin tone quite well plus, I can see myself using this for another design as it's very princess-ey. I'd say this is my favourite out of the bunch, however I may be bias because I tend to gravitate towards lilac shades anyway. The shift is quite hard to see on this one and you need to be up close but it's very pretty.

Coats: 3

//-----------------------------------------------------------------------------------------------------------------------//
And I'm done! I'm finally done! I only received these shades at the end of September.....I can finally put them away on my shelf (if there's room, I just made that thing and it's already almost full...)

Usually, I love Avon polishes however this collection was quite a let down and turned out nothing like the photos.


Look how pigmented those swatches are! They're so much darker than what they really are and that's what I thought I was getting. But that's what you have to put up with when ordering from Avon. I paid £3 each for them and £15 is a good price for 5 polishes but I really don't think these are worth it. Especially since I don't think I'l be using most of them again. They just take to many layers and take an age to dry.

SWATCHES: Avon True Colour Pro+ Nail Enamel // Halo Nudes Collection


Looks done using these shades:
-Halo Nights // Pink & Nude Wanderlust Design
-Lace // Clairestelle8 Valentines Challenge
SHARE:
Blog Design Created by pipdig