A Nail Art/Nail polish blog by a really nerdy software Engineer

Tuesday, 13 July 2021

NailNerdChallenge July 2021 // Beach/Ocean Nails

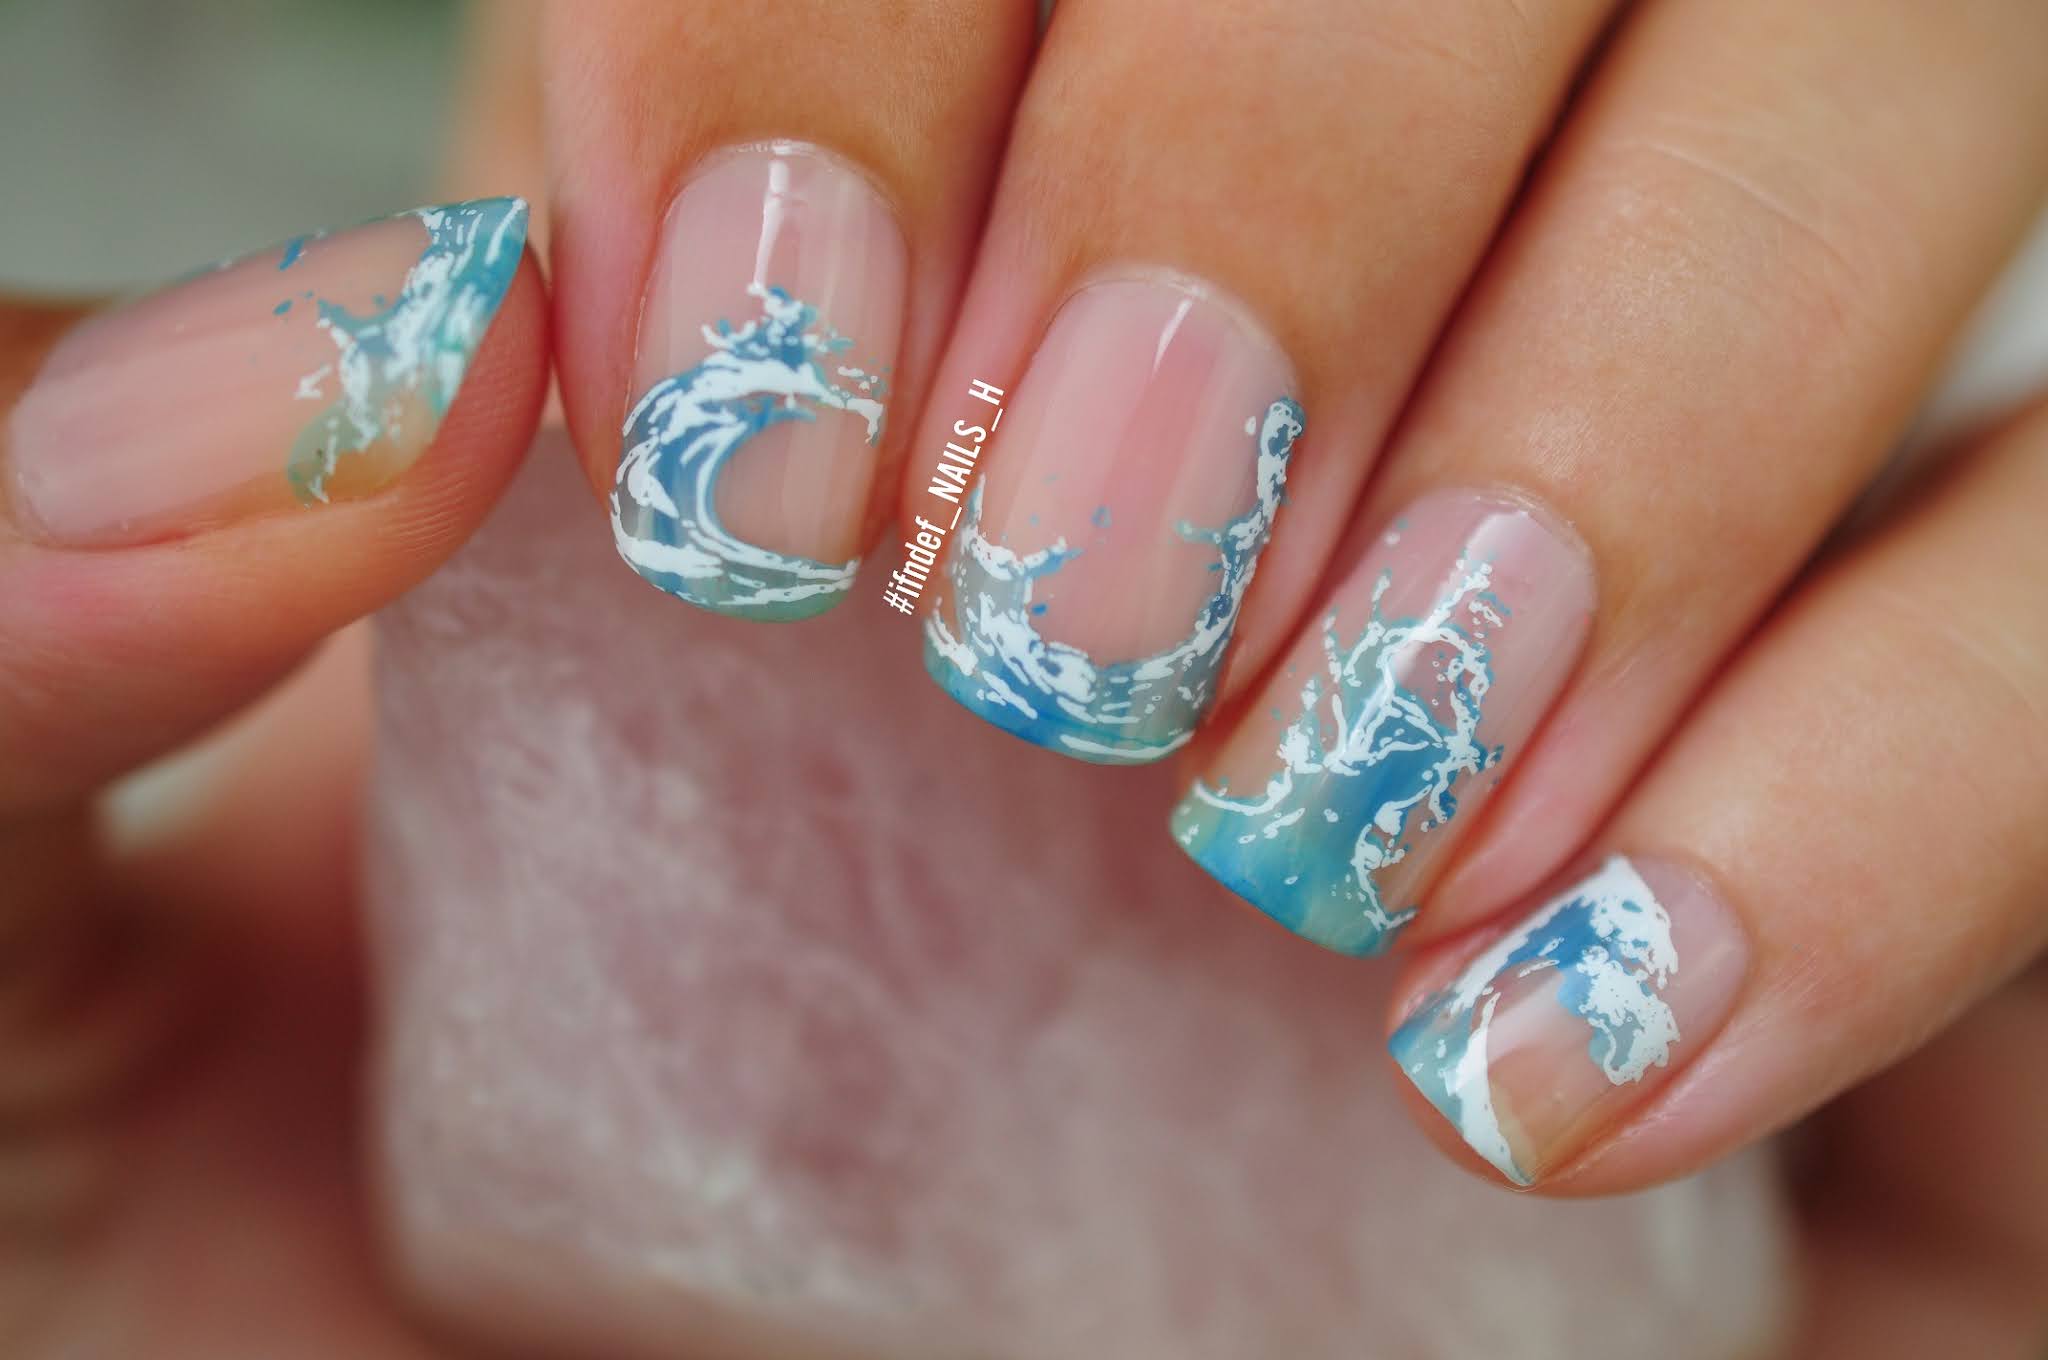
NailNerdChallenge July 2021 Beach/Ocean Nails - Negative Space Ocean Wave Nails

So I didn't miss the first weeks challenge; I just never posted it. Lol, I'll do that now. So anyway, here is the next prompt; beach nails!

I wanted to do something different than my usual sunset gradient with silhouette palm trees and opted for this negative space wave look and I have to say wow. Not to toot my own horn but I think I knocked it out of the park lol.  This has to be one of my favourite looks that I've done and it took me less than 20 minutes. It's so simple that I could do it on my other hand (not that I'm going to but it's nice to have the option).

NailNerdChallenge July 2021 Beach/Ocean Nails - Negative Space Ocean Wave Nails

Overlapping plates are simply the best kind of stamping plates. Not all of us have the artistic talent of Lieve91 (and I probably never will) so I love that these plates come to my rescue. This little plate I got off eBay a while ago and the wave designs are perfect.

NailNerdChallenge July 2021 Beach/Ocean Nails - Negative Space Ocean Wave Nails

I started out with my favourite OPI base, then added a layer of thirsty nails. It's honestly the best polish for giving the perfect flush pink natural nails that look great in negative space looks. For the waves I applied little blobs of Lillian, Super-trop-i-cal-i-fiji-istic and I'm on a sushi roll to the plate then blended it all together when scraping. When picked up it creates a nice blend of shades which give more depth. I used normal polishes because I wanted some sheerness as water is see through after all. I then added on some white detail and applied a glossy top coat.

NailNerdChallenge July 2021 Beach/Ocean Nails - Negative Space Ocean Wave Nails

These are perfect no maintenance nails as you don't have to worry about growth too much and I love the splash of colour at the tips of my nails (sea what I did there?? and there??)

NailNerdChallenge July 2021 Beach/Ocean Nails - Negative Space Ocean Wave Nails

NailNerdChallenge July 2021 Beach/Ocean Nails - Negative Space Ocean Wave Nails

Polishes/Tools used:-
Nails:
- OPI Infinite Shine // Conditioning Primer
- NailsInc // Thirsty Nails (sheer pink)
- Revlon Colorstay // Diamond Top Coat

Stamping:
- Pict You Stamping Plate // PY-F001 (overlapping waves)
- What's Up Nails // Blanc My Mind (white)
- OPI Infinite Shine // Super Trop-i-cal-i-fiji-istic (deep blue), I'm On A Sushi Roll (teal)
- Zoya // Lillian (pale blue)
SHARE:

Tuesday, 20 August 2019

Part-Time Seashell // Clairestelle8 August 2019 Challenge

Part-Time Seashell Clairestelle8 August 2019 Challenge - Seashell beach summer nail design

Part-Time Seashell Clairestelle8 August 2019 Challenge - Seashell beach summer nail design

I legit can't stop staring at my nails. It's like that scene in Family Guy when Peter gets beautiful and he can't stop staring at himself in the rear view mirror and crashes his car. This is me but with my nails. I should go get in my car with my Starbucks cup and take a photo to flex....show off my sick 14 year old Hyundai; that'll show the haters.

I also feel like another scene in Family Guy with these seashell decorations on:


For once I feel like I've had my nails done by an actual nail tech. I'm not sure what that feels like though because I've never had my nails done by someone else. They're just so shiny and glisten-y and duochrome-y. I got inspiration for this mani from Pinterest where I discovered a very talented nail artist called @nailartist_motico

The decorations were super cheap and easy to use; the same cannot be said about the glue. I kinda wished I had filmed this because it was actual disaster at one point with those stupid squirty nail tubes. They were just oozing out glue and then I had a big brain moment and tried to wipe it off with cotton wool...then cotton wool got stuck to everything and it was going all over my nails and not on the seashells. It was a stressful 5 minutes. I then managed to find my brush on glue which was so much easier. Nail hack: ignore glue in tubes and get brush on glue.

Part-Time Seashell Clairestelle8 August 2019 Challenge - Seashell beach summer nail design

Part-Time Seashell Clairestelle8 August 2019 Challenge - Seashell beach summer nail design

How I did it:-
OK so, the ring finger and pinkie are 2 layers of Pretty in Putty followed by a dusting of some iridescent powder from Born Pretty. I wish I could tell you which but it has no identification on it. It was a pale greenish looking one though that shine blue/pink. I then stuck two starfish on them.

The other fingers had two coats of Part-Time Mermaid and Dance Party 'Teal dawn sponged on. The sponge was mainly Part-Time Mermaid with the teal shade blotted around to give some depth in places. I them stamped on some sea foam using Pretty in Putty and the Nicole Diary L09 plate and dabbed on a little of risky business. It's such a great glitter and kind of looks like bubbles with all the different size glitter chunks. I applied a layer of top coat before the decorations; brushed on some glue and then stuck them on.

Part-Time Seashell Clairestelle8 August 2019 Challenge - Seashell beach summer nail design

Part-Time Seashell Clairestelle8 August 2019 Challenge - Seashell beach summer nail design

You can't do anything with these things on, especially if it's to do with your hair because it just gets caught. I'm so glad I'm wearing a peel off basecoat because these would seriously start to annoy me after a few hours. I love how it looks but it's so impractical. Good thing I like doing my nails everyday.

Part-Time Seashell Clairestelle8 August 2019 Challenge - Seashell beach summer nail design

Polishes/Tools Used:
Ciaté // Pretty in Putty (off-white beige), Part-Time Mermaid (blue/green shimmer), Risky Business (blue/purple glitter)
OPI // Dance Party 'Teal Dawn (teal)
Random eBay seller // Sea themed nail decorations
Nicole Diary // L09 Plate
Barry M Hi-Shine // Plumpy Top Coat
SHARE:
Blog Design Created by pipdig