A Nail Art/Nail polish blog by a really nerdy software Engineer

Thursday, 2 November 2023

Minty Jungle // Pastel Green Leaf Design

Minty Jungle // Pastel Green Leaf Design

I have wrapping paper that I bought from John Lewis a very long time ago that inspired this look. You could say it's a Christmas Wrapping paper look as I'll probably be using to wrap presents this year.

Minty Jungle // Pastel Green Leaf Design

I'm not happy with how hard it is to see the leaf design (even though the background colour is so light). I'll go in with darker colours next time.

Minty Jungle // Pastel Green Leaf Design

I started off with 2 layers of 'Til The Record Stops, then used a large stamp from Paradise 02. I put both Cobalt Indecent and I'm On A Sushi Roll onto the plate and mixed them together to create the stamp. I then over-stamped in some placed using Lor for that "gold foil" look.

Minty Jungle // Pastel Green Leaf Design

Minty Jungle // Pastel Green Leaf Design

Polishes/Tools Used:
Base:
- Color Club // 'Til The Record Stops (mint green)

Stamping:
- L'Oreal Paris // Cobalt Indecent (dark teal), Lor (gold)
- OPI Infinite Shine // I'm On A Sushi Roll (light teal)
- MoYou London // Paradise 02 Stamping Plate

Top:
MoYou London // Smudge Proof Top Coat


SHARE:

Wednesday, 4 October 2023

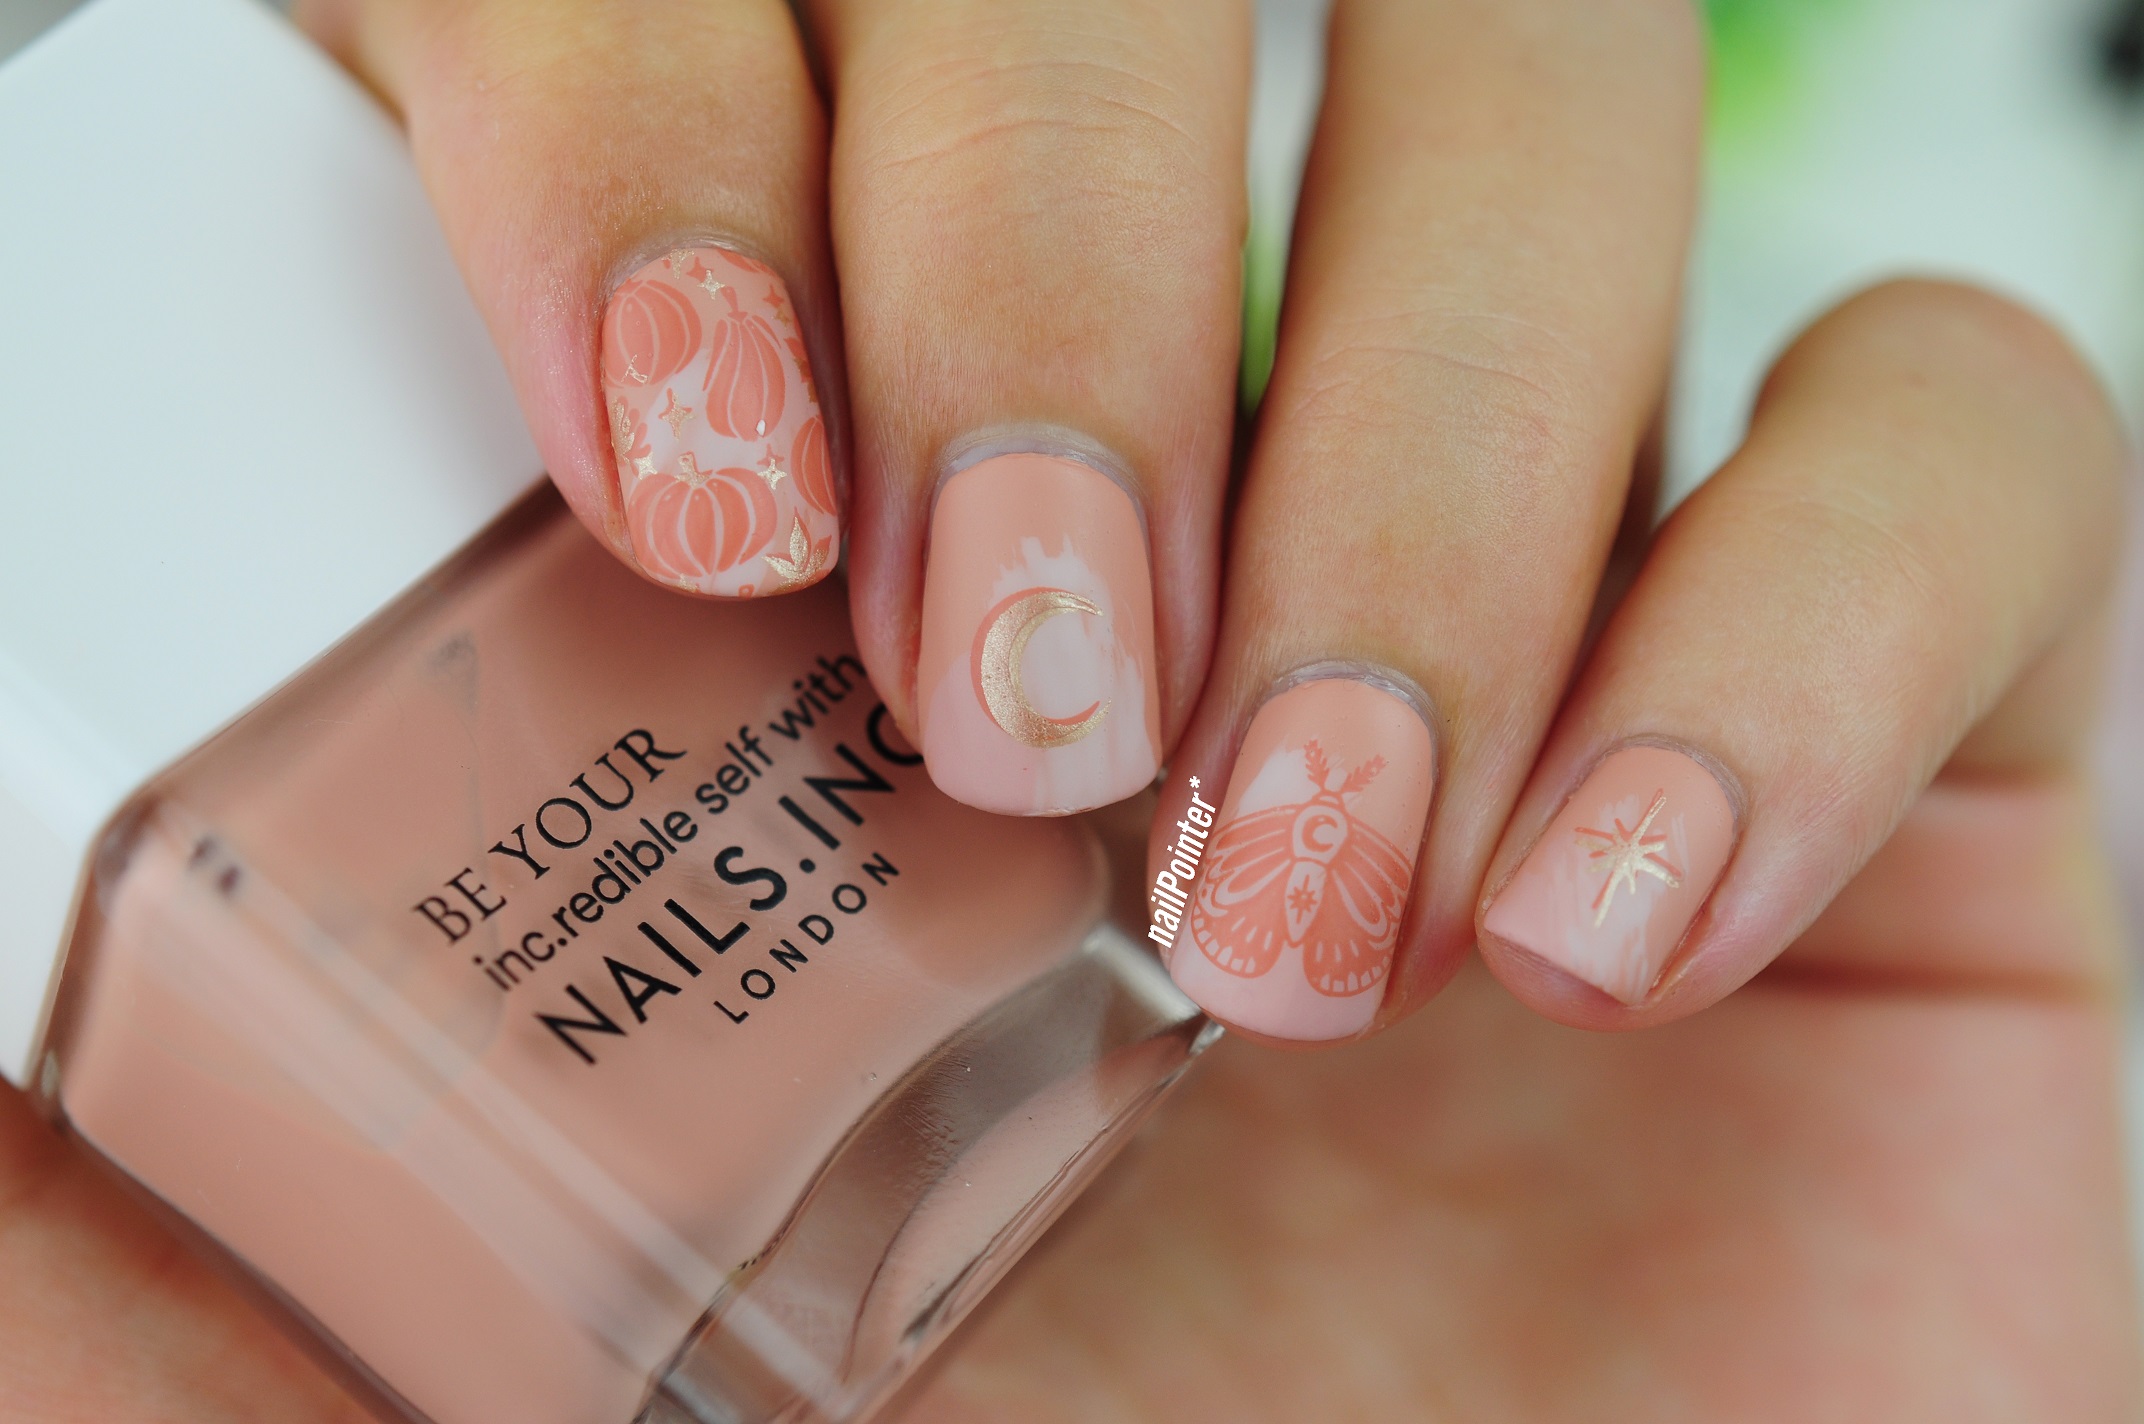
Autumn Lane // Nude Beige Autumn Nails

Autumn Lane - Nude Beige Autumn Nails Design using Nails Inc Nail Spice Collection and MoYou London

This came about whilst I was swatching the Nails Inc Nail Spice collection. I wanted to see how well the darkest shade could stamp and I think it turned out quite well.

Autumn Lane - Nude Beige Autumn Nails Design using Nails Inc Nail Spice Collection and MoYou London

I started off with 2 coats of Honey Lane, then dry brushed on some Pudding Lane and Bread Street for contrast. I used Nutmeg Lane for the base stamps and then used the L'or to bring some shine in via the gold before sticking a matte top coat on top.

Autumn Lane - Nude Beige Autumn Nails Design using Nails Inc Nail Spice Collection and MoYou London

This was a pretty quick look and quite effective! It feels like witchy vibes but make it pumpkin spice.

Polishes/Tools Used:
Base:
- Nails Inc // 
Honey Lane (dusty peach), 
Pudding Lane (pale pink), 
Bread Street (dusty pink),

Stamping:
- Nails Inc // Nutmeg Lane (terracotta)
- L'Oreal Color Riche // 660 L'or (gold shimmer)
- MoYou London // Fall in Love 15 Stamping Plate

Top:
- MoYou London // Smudge Free Top Coat
- Barry M // Matte Top Coat
SHARE:

Thursday, 27 May 2021

Ice cream Candy // Brown & Pink Ice Cream Drip Nails

Ice cream Candy Brown, Pink Neon Ice Cream Drip Nails

The days are getting brighter and warmer so that means one thing; ice cream drip nails!! It's been a while since I've done some nail art. I was feeling burnt out by everything and I don't think the winter weather helps but today I sat down and spent 3 hours on these nails.

They are a recreation of these amazing nails by @NailFashionByJenny. I saw this video on pinterest and I just had to give it a go as I love the colours and I recently just bought false nails in this exact shape.
Ice cream Candy Brown, Pink Neon Ice Cream Drip Nails

How I did it:-
- Started off with 2 layers of Cuir Chocolat (brown), 5 coats of Spring In My Step (pink) and 3 coats of Pack Lightly (nude beige). After all that had dried I applied a matte top coat to all except the thumb.

- For the drips I used Flashdance on the brown nail, Cuir Chocolat on the pink nail and Pink Voltage (neon pink) on the nude nail. To do the drips, I painted on solid colour at the edges about 1cm up. Then used a liner brush to draw thin lines coming down from that. Using the brush I used extra polish to join the lines up so it was more rounded. I then used a large dotting tool to place balls at the end, then used the liner brush to connect it to the line and remove harsh edges.

- For the milkshake nail, I covered the bottom half of the nail with 1 coat of Spring in my Step, then used a liner brush with Cuir Chocolat, Pink Voltage and Blanc de Lune (white). For the 3D effect of the milkshake, I used a large dotting tool and 3D painting gel in After the Snow. I would pick up a large amount on the end of the dotter and place it on the nail; curing after every few dots. I then used Pink Voltage, Flashdance, Honolulu Blues (blue) and Jaune Citron (yellow) as sprinkles on the milkshake and the drips on the other nails.

- I then took some gems from a wheel of assorted nail gems bought from Primark and placed them near the top of the nail.

- For the thumb, I used the striping brush with Blanc de Lune and Pink Voltage to create the lines.

Ice cream Candy Brown, Pink Neon Ice Cream Drip Nails

Ice cream Candy Brown, Pink Neon Ice Cream Drip Nails

My striping skills leave something to be desired but practice makes perfect! I also used normal polishes for this and I've found striping with gel is so much easier.

Polishes/Tools Used:-
-L'Oreal Paris Color Riche // B25 Cuir Chocolat (brown), B07 Jaune Citron (yellow), 112 Blanc de Lune (white)
- China Glaze // Spring In My Step (pink), Pink Voltage (neon pink), Pack Lightly (nude beige)
- Beau Nail Polish // Honolulu Blues (blue)
- Maniology // Flashdance (peach pink)
- Born Pretty 3D Painting Gel // BP-PG02 After The Snow (white)
- Essence // Double-ended dotting tool
- Nail Magic // Brush on glue
- Primark // Assorted Nail Gems
- Barry M // Matte Top Coat
- Cuccio // Mini LED Nail Lamp
SHARE:

Tuesday, 27 October 2020

Slime Noir // Black And Green Dripping Halloween Nail Art Design

Slime Noir // Black And Green Dripping Halloween Nail Art Design

Time for another spooky look! Like I said, I'm obsessed with Zoya Pixie Dust and dripping designs so that's where this came from. Also, no stamping! I'm trying my best to use different techniques and I simply blobbed on the green polish using the brush and then drew on the cobwebs with a fine brush and some acrylic gouache. 

Slime Noir // Black And Green Dripping Halloween Nail Art Design

I'm also in love with the black. It's a one coat wonder and dries pretty quick as well. My local TK Maxx just got this massive shipment of L'Oreal Colour Riche Nail Polish and I pretty much bought them all as they are super pigmented. I use them as stamping polishes that's how good they are. 

Slime Noir // Black And Green Dripping Halloween Nail Art Design

I did however spill a brown one all over my grey carpet when I was swatching them...I've tried everything. YouTube has failed me. Oh well, I'm going to say it's a style statement.

 Slime Noir // Black And Green Dripping Halloween Nail Art Design

Polishes/Tools Used:
- L'Oreal Colour Riche // 674 Noir Noir (black)
- Zoya PixieDust // Cece (green)
- Holbein Acrylic Gouache // D925 Titanium White
- Windsor & Newton Cotman Brush //  0000 Round

SHARE:
Blog Design Created by pipdig